
How to measure Surface Brilliance
The measurement button is used to start single or multiple measurement that are sent directly to the table.
- Calibrate the sensor
- To access the multiple readings feature, right click on the measurement button.
- Press the measurement button to start.

How to measure Surface Brilliances on surfaces using the interactive measurement feature
The interactive measurement function is a "live" view of the sample surface. It is used to identify particular areas of interest when measuring surface brilliance.
Measurement Procedure
Ensure the sensor is calibrated.
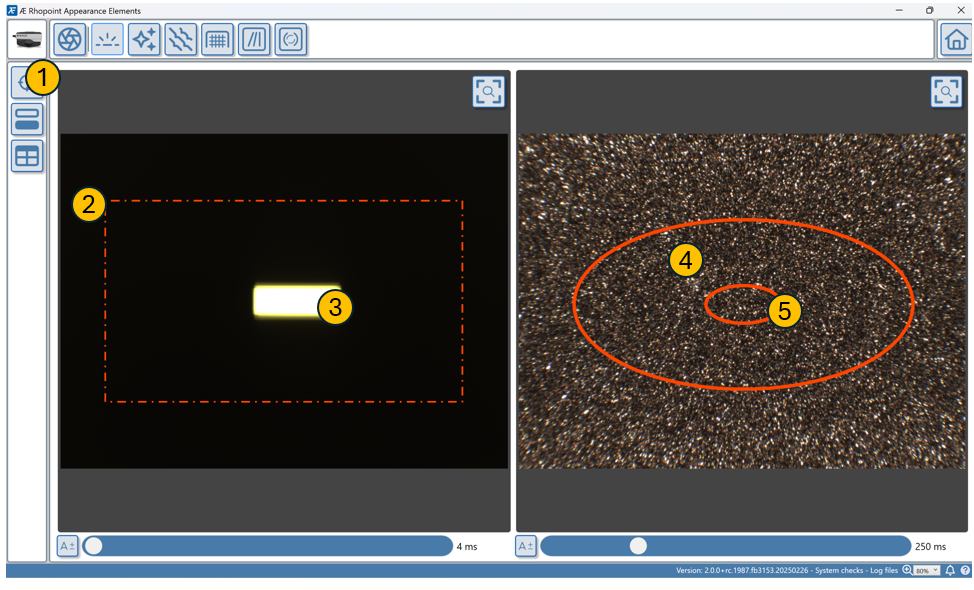
Press the button (1) to activate the interactive measurement feature.

Use the auto-exposure button ( A+/) to optimise the camera exposure for the surface's reflectivity.
Manually adjust exposure if needed using the slider.
The red dashed area on the live display indicates the target measurement zone for the gloss sensor gloss.
If measuring a curved or uneven surface ensure the gloss reflection (3) is centered in the red dashed box (2) by manually adjusting the orientation of the sample or sensor.
To measure the gloss of a specific area on the surface move the sensor until the required area is covered by the correct red ellipse (4 & 5).
The reflected gloss image on this high gloss coating is intense and sharp & positioned centrally for an accurate gloss measurement.
The surface image shows the area on the surface where the gloss is measured (4- measurement area for standard gloss adaptor & 5- Small area/ curved surface adaptor)
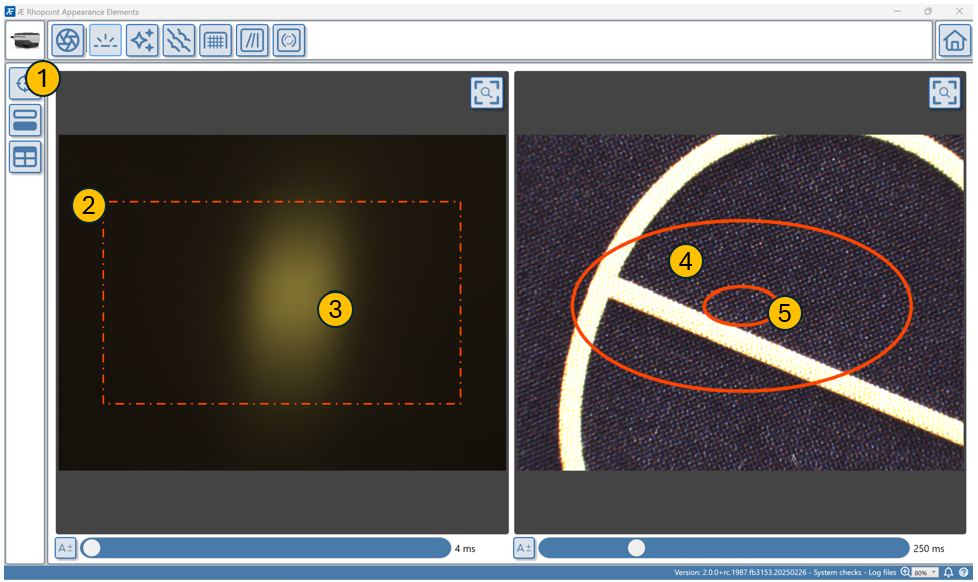
The gloss peak for matt and semi-gloss surfaces is less distinct, for alignment purposes ensure the brightest part of the image is within the red square (2).
Matt surfaces will reflect a image without a peak, ensure the red dashed box on the camera sensor sensor is evenly lit before taking a measurement.