Adjusting Texture Module User Parameters
Adjusting the Feature Properties (Watershed parameters)
Manual Adjustment of the Feature separation

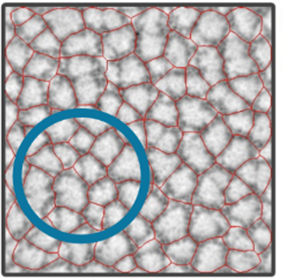
- Visual Inspection
Start by visually inspecting the height image and the initial segmentation results by using the default settings
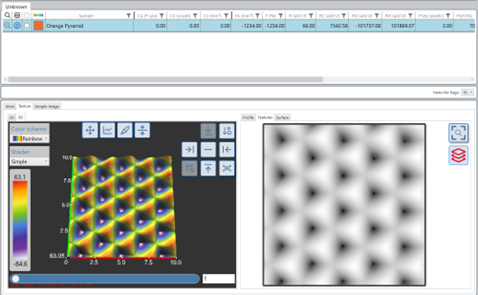
(Default: Feature separation: 3px, Feature selection: 70%).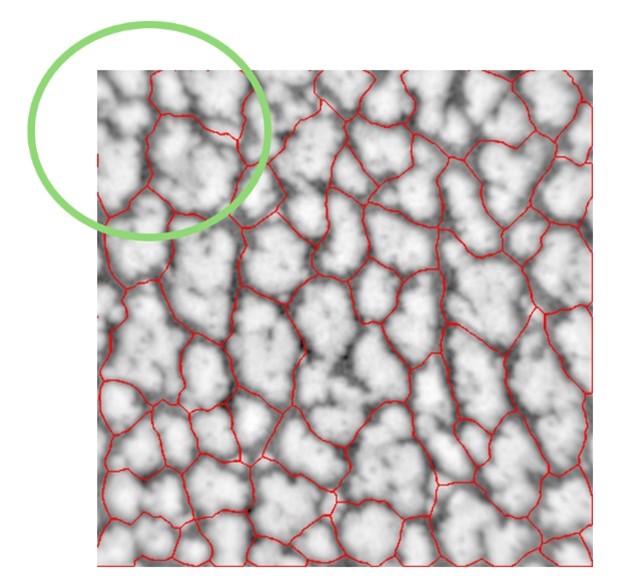
In the image above, the default settings have not segmented the whole map successfully- by visual inspection we can see that some features are not separated. In this example features are separated by low areas (valleys) and represent distinct high areas or hill.
- Adjust Thresholds
Modify the watershed parameters in “Feature properties” and observe the effect on the feature detection.
Adjust Feature properties and test different values, then evaluate their impact on the segmentation.
Feature Separation (Watershed Morphology)
This parameter increases the gap between the found features (hills) by the separation value (number of pixels)
Increasing the amount of Pixels used will separate some touching features, and thus increase the number of detected features (hills).
Feature Selection (Watershed Selection Percentage)
This value from 0% to 100% determines which size of features (hills) are included in the evaluation after separation.
While increasing this number will exclude smaller unwanted features, it should be reduced for smaller shapes.
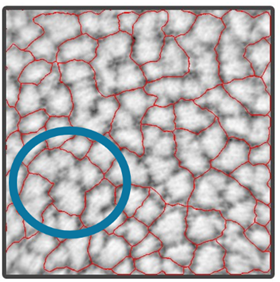
In the analysis the watershed algorithm has not separated all the features (hills)- the feature separation parameter “Feature selection” should be increased.
Watershed parameter adjustment
To adjust the areas selected by the watershed.
- Click the settings button on the right side menu.
- Click the plus button to expand “Feature properties”.
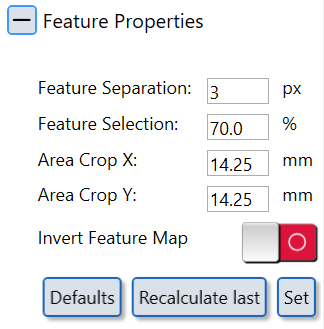
Adjust “Feature Separation” (watershed morphology) and “Feature Selection” (Watershed Selection Percent) parameters.
- Press "Set" button.
- Press "Recalculate last" button.
Increased Feature Separation value will now correctly analyse the shapes.
! |
! |
|---|---|
| Before | After |
Invert feature map algorithm
Standard textures and Leather are described by hills which are spatially separated by valleys.
Some technical textures, however, form the actual texture by hills (along their maxima).
For these textures, the standard algorithm will not yield a good or none result, in which case the algorithm has to be “inverted”.
When this happens, please use the “Invert Feature Map” setting, set and recalculate.
Example: the measurement of a technical laser texture does not yield any reasonable results, no matter what is set up in feature selection.
After selection of “Invert Feature Map” and setting appropriate values, the results become reasonable.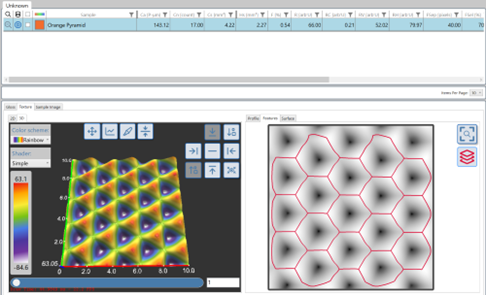
Cutting the area of interest
For some applications it might be advisable that the area of interest is cut to a smaller or even larger region than the default (10.00mmx10.00mm), e.g., for steel or metallized surfaces.
This helpful in those cases were there are damages or over illumination due to material albedo at the edges.
In this case, you cut to a more specific region, defining an area by width and height (X and Y) distance, around the centre point of the image (0/0).
For example, Standard setup 10.00mmx10.00mm, from centre point 5.00mm to the left and to the right, as well as 5.00mm up and 5.00mm down.
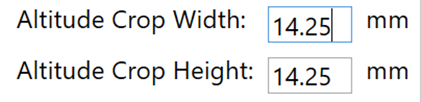
Cut to 10x10, or 5mm in all directions: enter 10mm Width and Height, “Set” and “Recalculate last”.