
Connecting an Instrument
In Live mode, COM Agent reads measurement data directly from an instrument over a serial (COM) connection.
1. Connect the hardware
- Connect the instrument to the PC using its serial cable or USB-to-serial adapter. Some instruments (CBT1.2, NovoHaze TX) require a special cable — see the overview.
- Switch the instrument on.
2. Choose the connection settings
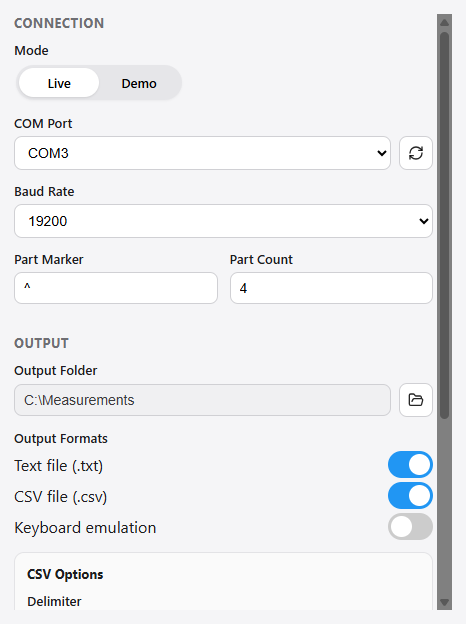
In the Connection section on the left:
| Setting | Description |
|---|---|
| Mode | Set to Live to read from a serial port. (Use Demo to try the app without hardware — see Demo Mode.) |
| COM Port | Select the port your instrument is connected to. Click the refresh button to re-scan for ports after plugging in an adapter. |
| Baud Rate | The serial speed. The default for Rhopoint instruments is 19200. |
| Part Marker | The character the instrument prints to mark each part of a complete data set. The default is ^. |
| Part Count | How many part markers make up one complete data set. The default is 4. |
Part Marker and Part Count tell COM Agent when a measurement is complete. A data set is written out only once the expected number of markers has been received and the line ends — this prevents half-received measurements from being saved. The defaults match Rhopoint instruments; only change them if advised by Rhopoint Support.
3. Choose what to do with the data
Decide how each measurement should be saved or forwarded:
- Write files — see Output Formats.
- Type values into another application — see Keyboard Emulation.
You can combine these (for example, write a CSV file and type the mean into a spreadsheet).
4. Start capturing
Press Start (top right) and take a measurement on the instrument. The activity log on the right confirms data is arriving. See Capturing Measurements for details.