
Main Operation
Main screen overview
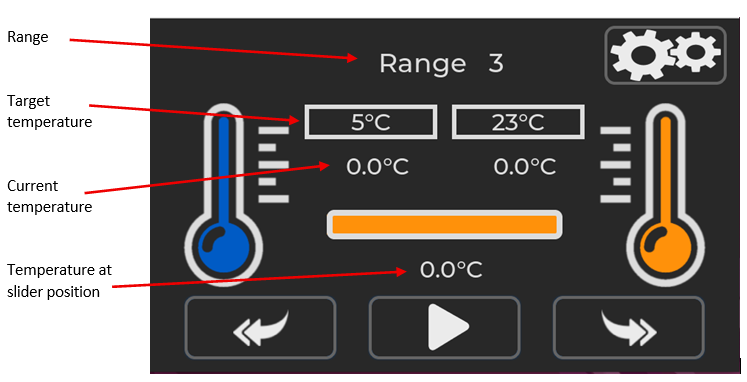
The main operating screen for the MFFT instrument will look like the above. In this example range 3 has been selected but the instrument is not set to start achieving target temperature.
To change the target range, press the back or return button
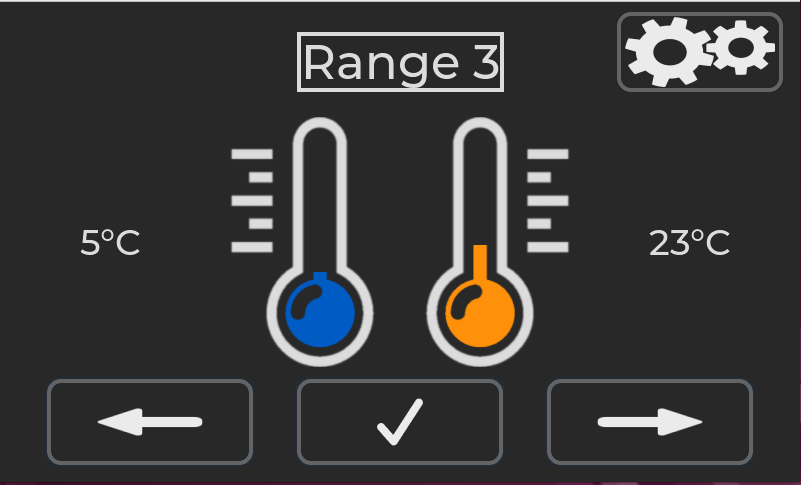
Press the left of right arrow buttons to cycle through the range options.
![]()
![]()
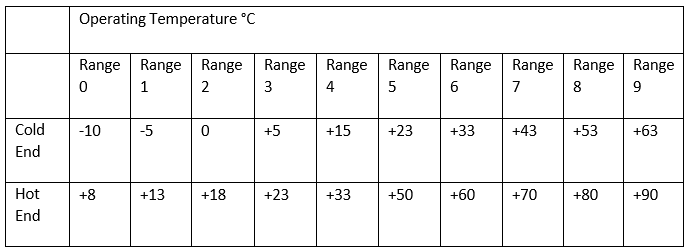
The MFFT instrument has 10 operating ranges. Range 0 – 9. Target Cold end and Hot end for each range is shown in the table below.
When the desired range has been selected use the tick button to confirm the selection.
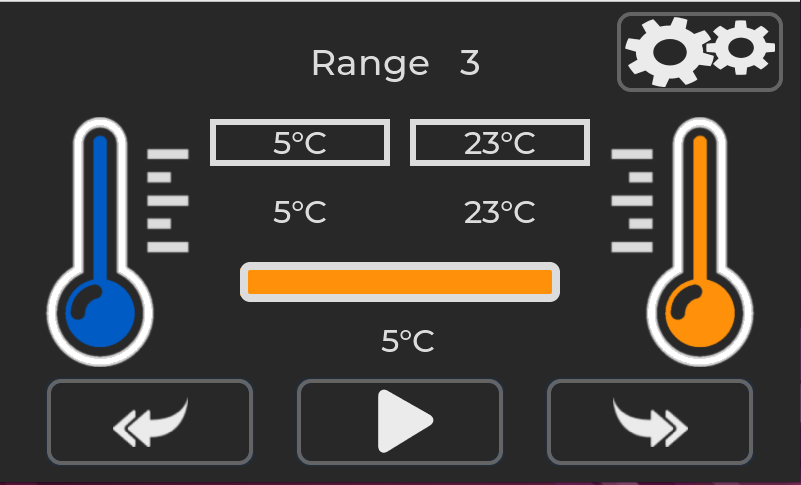
With the desired range has been selected press the play button.
The heating and cooling process will start.
The play button will change to a pause button.
Pressing the pause button will stop the heating and cooling process.
When the target temperature is reached the thermometer outline will turn green, indicating correct temperature.
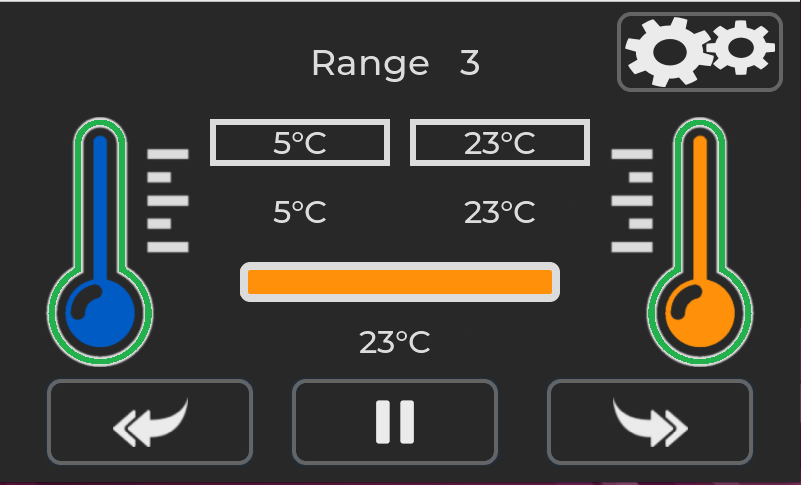
An audio system ready beep will also sound. To mute the audio alert the speaker icon can be pressed.

Pressing the right-hand double arrow button will progress to the next screen. 
The plate temperature will continue to maintain at the set points. The sample to be tested can now be placed on the test pattern.
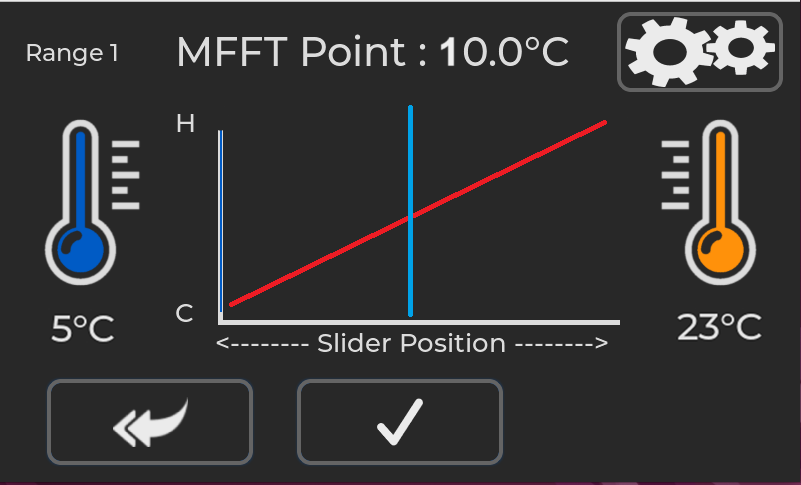
The screen will now show the hot and cold set points and the MFFT point.
When the sample has dried, move the cursor to the MFFT point.

When the cursor is at the correct position press the tick button to accept the values.

The results of the test are displayed on the screen.
Press the return button to exit back to the main range stabilization screen.
Press the save button to export the results to a CSV file.
A csv file will be saved on a USB drive if inserted. The USB port is on the rear of the instrument.
Example of the CSV file
Serial Number,MFFT123456
Date,21 Aug 2025
Time,13:52
Range,9
Cold,63
Hot,90
MFFT Point,72